1. INTRODUCTION
LEparagliding is a fortran program that reads a txt data file that completely defines the paraglider (leparagliding.txt),
performs the calculations, and writes the results in the form of
graphics (dxf) and text files. It's almost "magical"... because you
write all the data in txt and the result are beautiful 2D and 3D dxf
plans that completely define
the project, and some files with list and reports. I like this system
because it is the simplest and lightest, and works very well.
That’s why I’ve always been reluctant to make a graphical interface,
since I saw no interest in it. It's easier write the text file
directly, and I reaffirm! :) Viewing, copying, and modifying blocks of data is also much easier and faster in the text version.
Nonetheless,
it is true that is necessary a bit of abstraction to imagine what the
outcome will be, after writing in a neat and strict format a lot of
numbers in a text file. If a small format error is made, changing a "0"
by an "O", a period by a comma, an integer to a real one, or indicating
the incorrect length in a list, the program will not be able to read
the file and will not give any result, resulting in frustrating
experience. It is necessary to know very well the data structure. Also, the available documentation is a bit rough and
sometimes not too clear.
This is why a graphical interface can be a clearer way to enter and
select data. The structure of the interface itself can help us
understand what is being done, adding small fixed or interactive
sketches, notes with tips and reminders, and adding some internal
functionality that seeks in the consistency of the data, or
automatically propose some values. Currently the program does not
provide much automation, then it can be a nightmare for users not
experts in the txt version.
LEparagliding GUI wants to achieve this. In the current design, it
still remains "rough", since most sections are fields where numbers
must be entered, with few explanations or schemes (we will add later).
But the main functionality is already achieved. The graphic program is
currently able to read the LEparagliding data file, make changes to any
section, write the results and run the fortran program to generate the
drawing files in dxf. The GUI can also read and modify the pre-processor program data file to define the basic geometry (planform, vault, cells number and distribution, and export the results to the main program.
LEparagliding
GUI (lepg) has been developed by Stefan Feuz (Switzerland) and Pere
Casellas (Catalonia), programmed in the interpreted and multiplatform language Tcl/Tk. Stefan has also
started the development of a Python version. The program can run on
Linux and Windows operating systems. Its operation on Mac will be
studied, which is probably also possible. It is intended to be
multilingual (currently only the English version is complete, followed
by the German version).
2. DOWNLOAD LEP-GUI AND INSTALL TCL 8.6
2.1 Download LEparagliding GUI
Download the latest version of the program here (updated 2021-02-01). The program does not need installation, since it is simply a matter of
unzipping the zip file to a folder on your computer and start working.
But before you start to work, you will need to check some things, and
install additional software if necessary.
2.2 Install a Tcl/Tk language interpreter in your computer.
Minimun required Tcl version is Tcl8.6
a) Linux
Most Unix / Linux operating system distributions, as well as Mac OS X, include Tcl/Tk.
If not already installed, you can use your system's package manager to
install the appropriate packages. For example, on an Debian/Ubuntu
system, you can type:
apt-get install tcl
b) Windows and Mac
Try install a binary distribution
You may create a free account and download from ActiveState https://www.activestate.com/products/tcl/downloads/
2.3 Verify that the LEparagliding executable files work correctly on your system
a) Linux
Go to the folder lepg/lep-3.15-lin64/lep/
delete o rename the files leparagliding.dxf lep-3d.dxf
type ./lep-3.15-win64.out
New files leparagliding.dxf and lep-3d.dxf will appear in the directory
Go to the folder lepg/lep-3.15-lin64/pre1.6/
delete o rename the files geometry.dxf
type ./pre-1.6-win64.out
New file geometry.dxf will appear in the directory
b) Windows:
Go to the folder lepg/lep-3.15-win64/lep/
delete o rename the files leparagliding.dxf lep-3d.dxf
Double click in lep-3.15-win64.exe
New files leparagliding.dxf and lep-3d.dxf will appear in the directory.
Go to the folder lepg/lep-3.15-win64/pre1.6/
delete o rename the file geometry.dxf
double click in pre-1.6-win64.exe
New file geometry.dxf will appear in the directory
c) Mac
I don't have Mac computer. For this reason, if you want to use
LEparagliding you must compile the code yourself! You need to install a
gfortran compiler.
Read here: https://gcc.gnu.org/wiki/GFortranBinaries
And try: https://brew.sh/
Compile by typing: gfortran leparagiding.f and gfortran pre-processor.f
Once compiled, you get the executables (probably .out files) and may test exactly as in Linux case.
If
you have previously used LEparagiding in text version, you can continue
to use the same working directory, executables, and examples you
usually use (no need to use the lep-3.15 directories provided as
example). But when using the GUI version it is mandatory that the
titles in sections 1 to 31 be exactly the same as in leparagliding.txt
example file version 3.15.
3. STARTING THE PROGRAM AND INSPECTING THE MAIN SECTIONS
Learn how to use lepg by following the 20 instructions below.
1) Go to the folder lepg/
Linux: tclsh lepg.tcl
Windows: double click in lepg.bat
Then lepg should start!
2) Go to "Settings" menu and select your language. Currently only
english language is supported 100%. German
version also has an important active part. Home screen also in Polish
and Russian. There is work to be done on translations. Volunteers send
e-mail. Close the application and restart
for the changes to take effect.
"Settings"
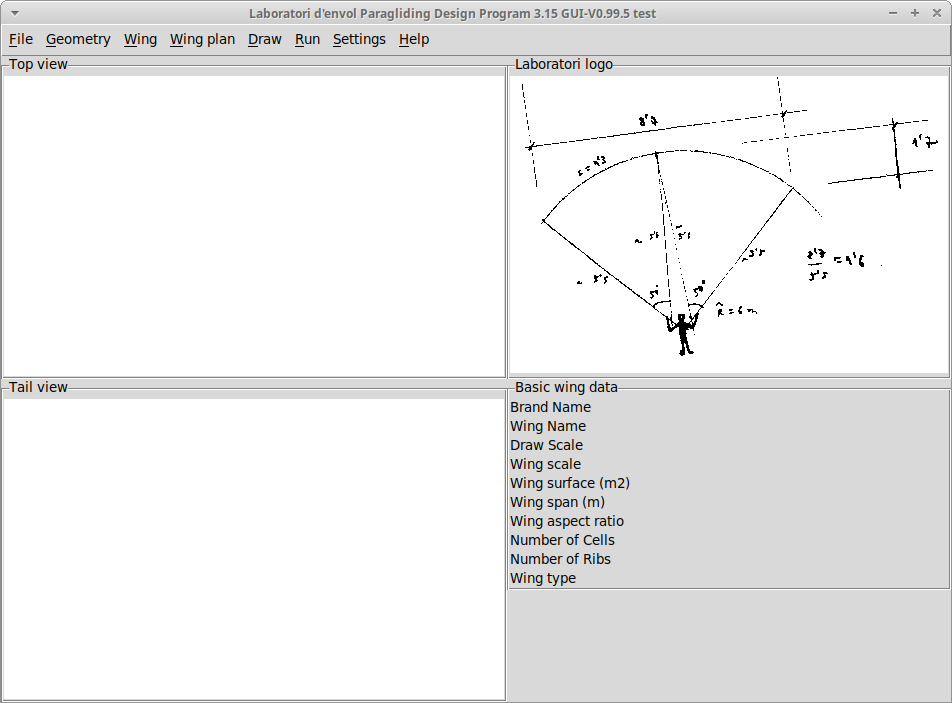
"Main project image": Select your .gif or .png image with a width of
approximately 500 dots, to customize your home screen, related to the
project you are working on, a hand drawing, or your company logo. Yoy may store your images in lepg/img folder.
3) Go to "Wing" menu and "Open data file..." select the leparagliding.txt example file provided with the aplicacion in the folder lepg/lep-3.15-lin64/lep/ or lepg/lep-3.15-win64/lep/ according to your system

4) The example gnuGUI-test appears on the screen.
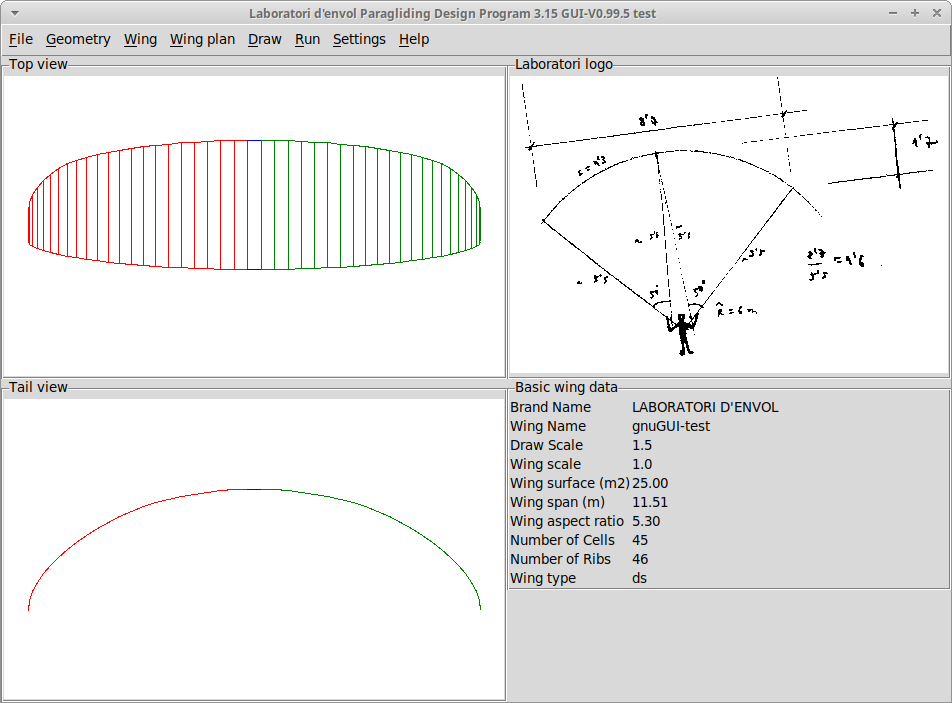
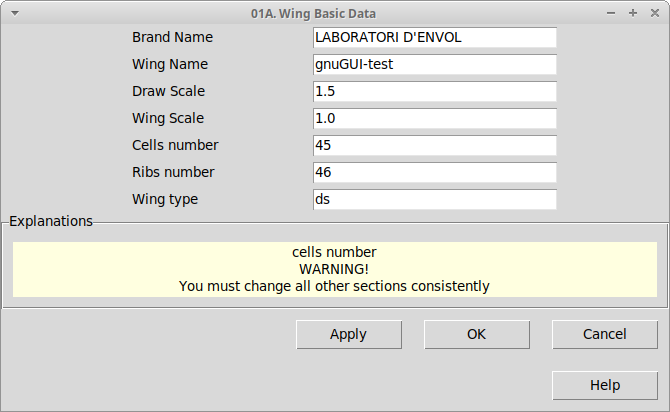
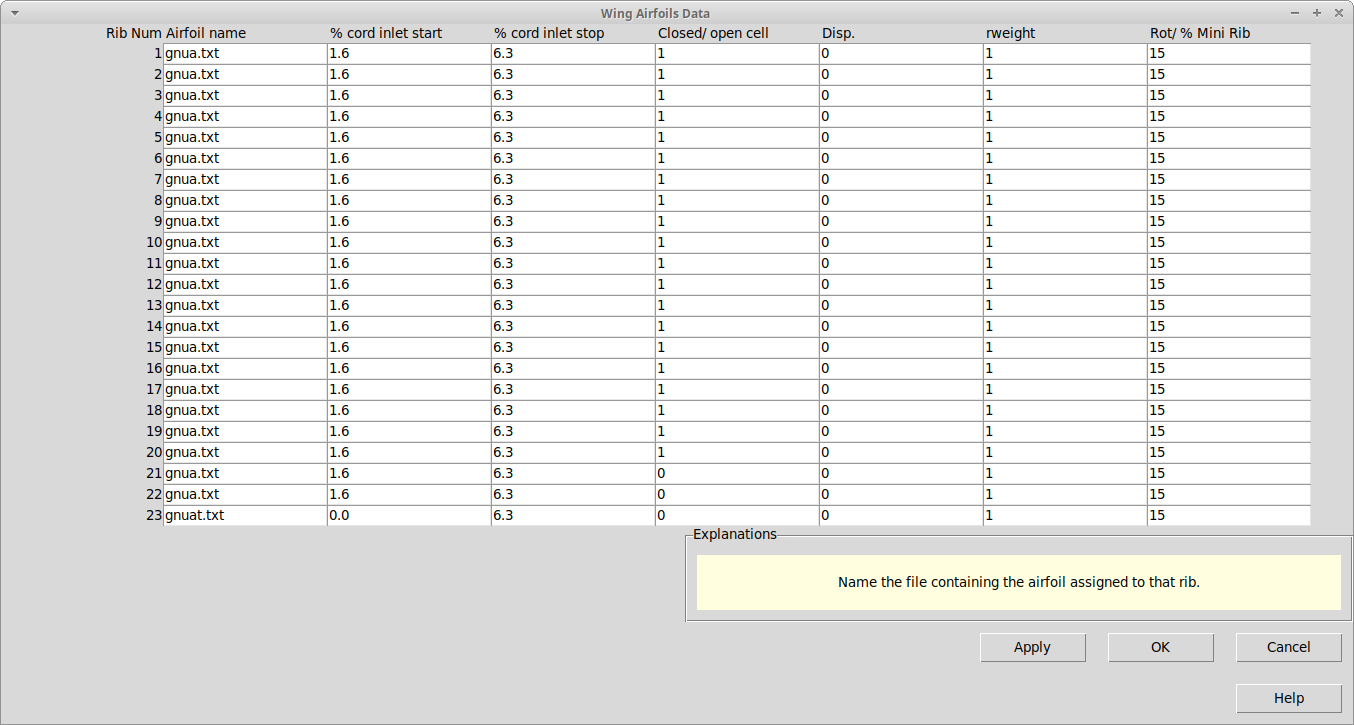
5) Now, you can go to the menus "Wing" or "Wing plan" and edit each of
the 31 sections of LEparagliding. For now, DO NOT CHANGE the wing cells
or ribs number. You can change other settings but not this one! :)
Each section number corresponds exactly with the section of the
LEparagliding fortran program. Even the data structure is identical.
But, we have not yet written a specific manual, or added fixed or
interactive schemes to indicate what it is necessary to write in each
section. The "Help" buttons still do not provide the necessary
information :( That's why, you still will need to go to the fortran manual one and try to decipher the information in each section.


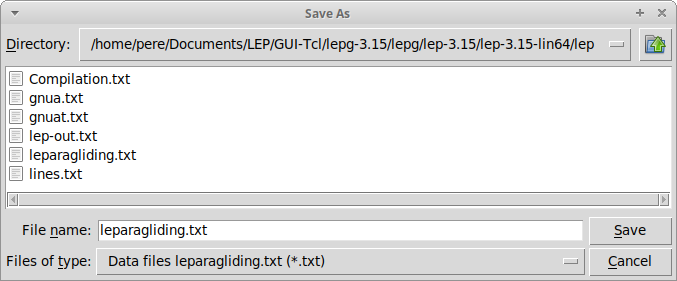
6) You can now return to menu "Wing" and do "Save data as..." and write or overwrite the data file leparagliding.txt with the new data.
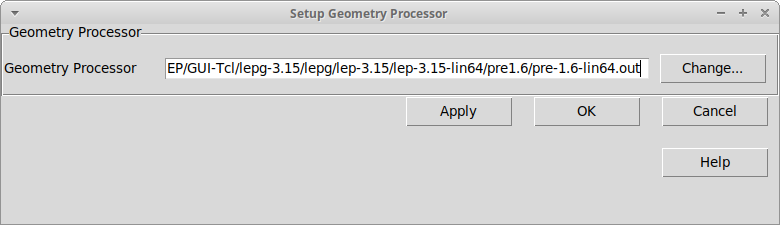
7) Go to "Settings menu" and select your executable file, lep-3.15-lin64.out or lep-3.15-win64.exe
8) Return to menu wing and click "Calc wing". In a few seconds a window
with a yellow background will appear, with the reading confirmation
report for each section, and the final results:
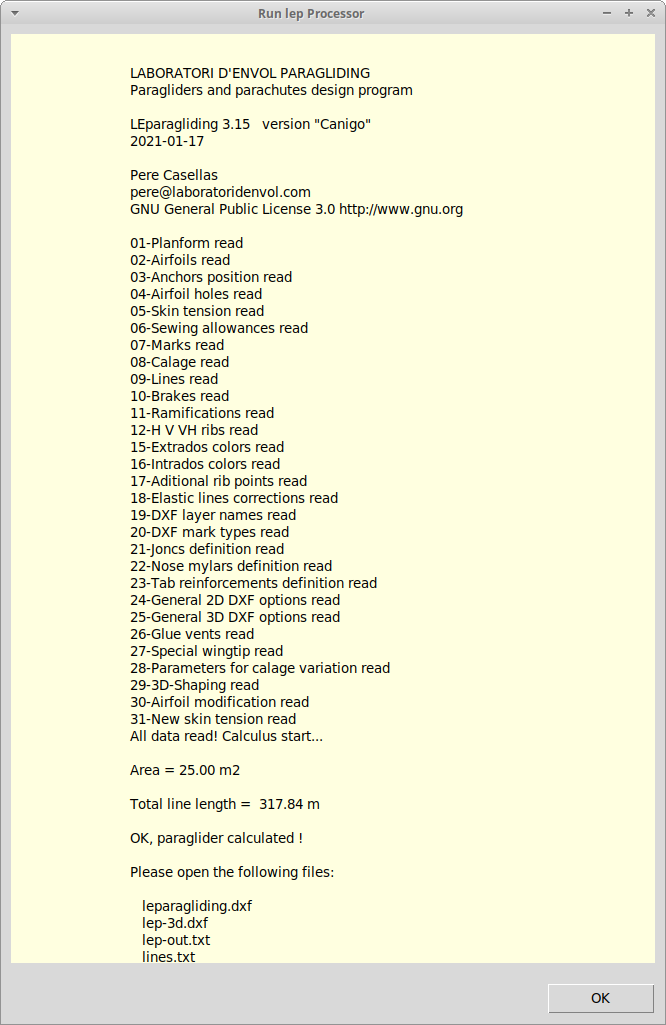
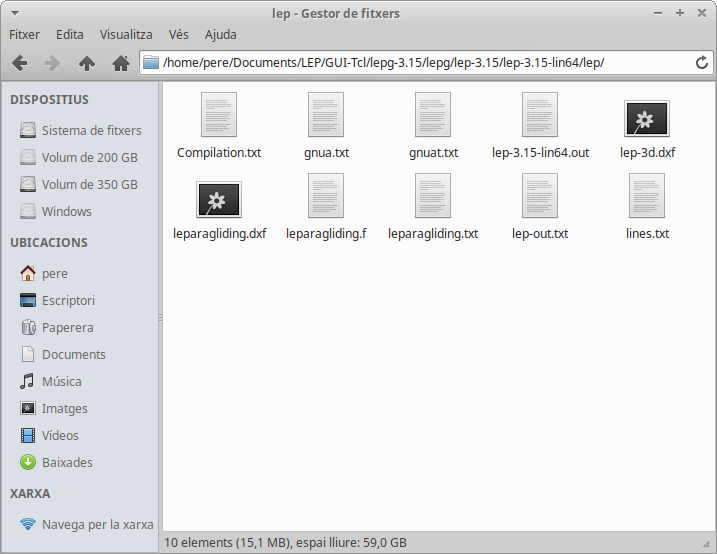
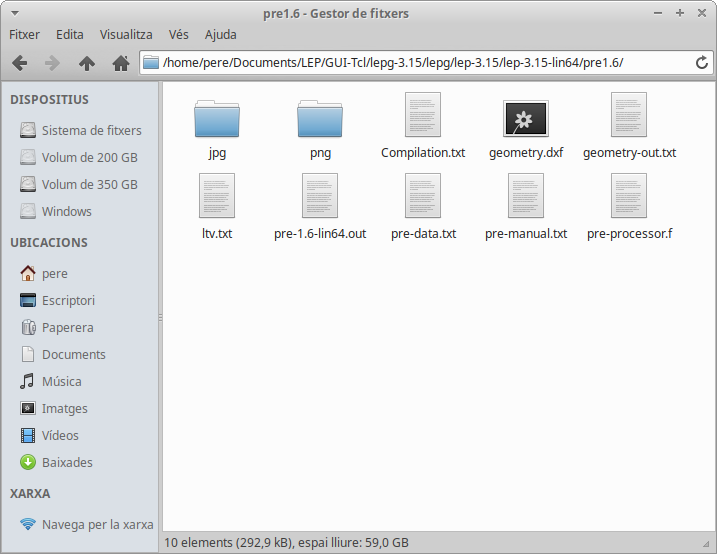
9) Now you can open the lep working directory, where the data file,
profile files, and result files in dxf and txt are located. The
calculation is finished and now you can analyze the dxf files with
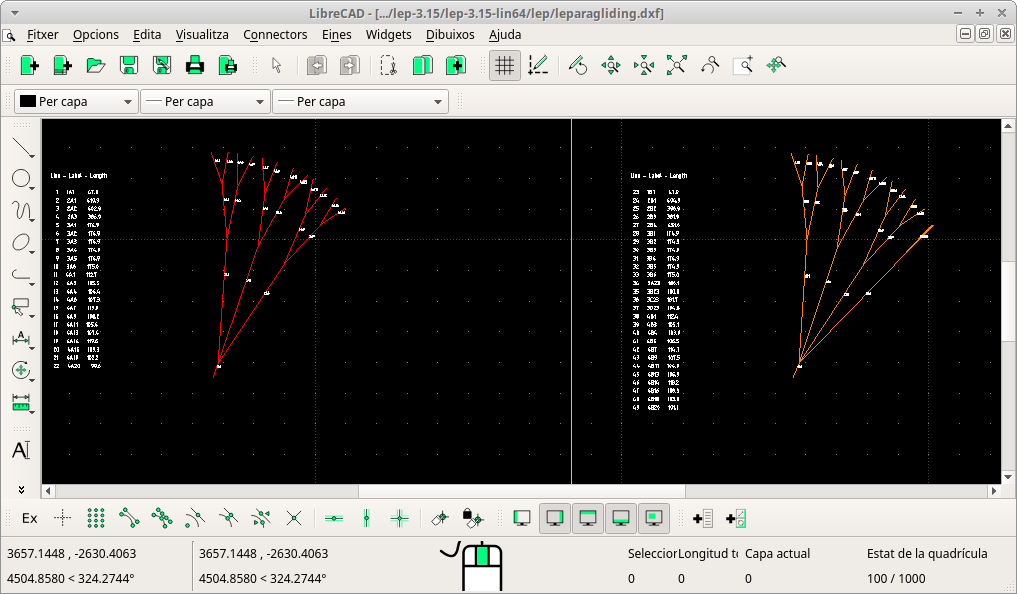
programs like Autocad or equivalent, with 2D and 3D capability:
leparagliding.dxf (2D plans)
lep-3d.dxf (3D model)
line.txt (list of lines)
lep-out.txt (txt report)

10) Ok..., but how can I change the cells number, wing planform and
vault? There are several ways. Now we will explain the simplest.
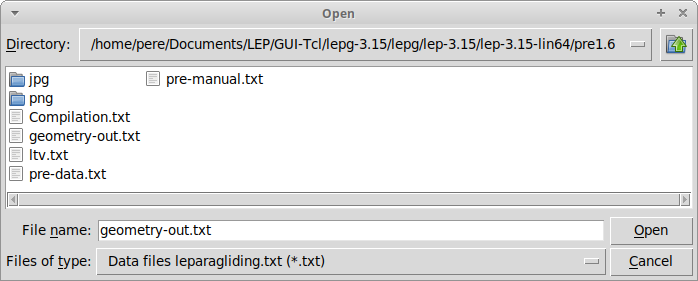
11) Go to menu "Geometry" and then "Open Geometry file..." Select your pre-data.txt pre-processor file. In the example located in folder: lepg/lep-3.15-win64/pre1.6/

12) "Geometry" --> "Edit Geometry" --> "Apply"
The Geometry menu works with the preprocessor program and generates a
geometry-out.txt geometry matrix that can then be imported into the
main program's data file. You can also create the geometry matrix by
your own methods, and thus generate any shape.
13) We are now in the geometry edit menu. The LEparaglising system is a
little different from other programs. The shapes of the wing are
defined by mathematical functions, and we must choose the appropriate
geometric parameters. We haven't written the manual yet or activated
the "Help" button ... so you'll need again read the written manual for
the non-graphic version. The data structure is similar.
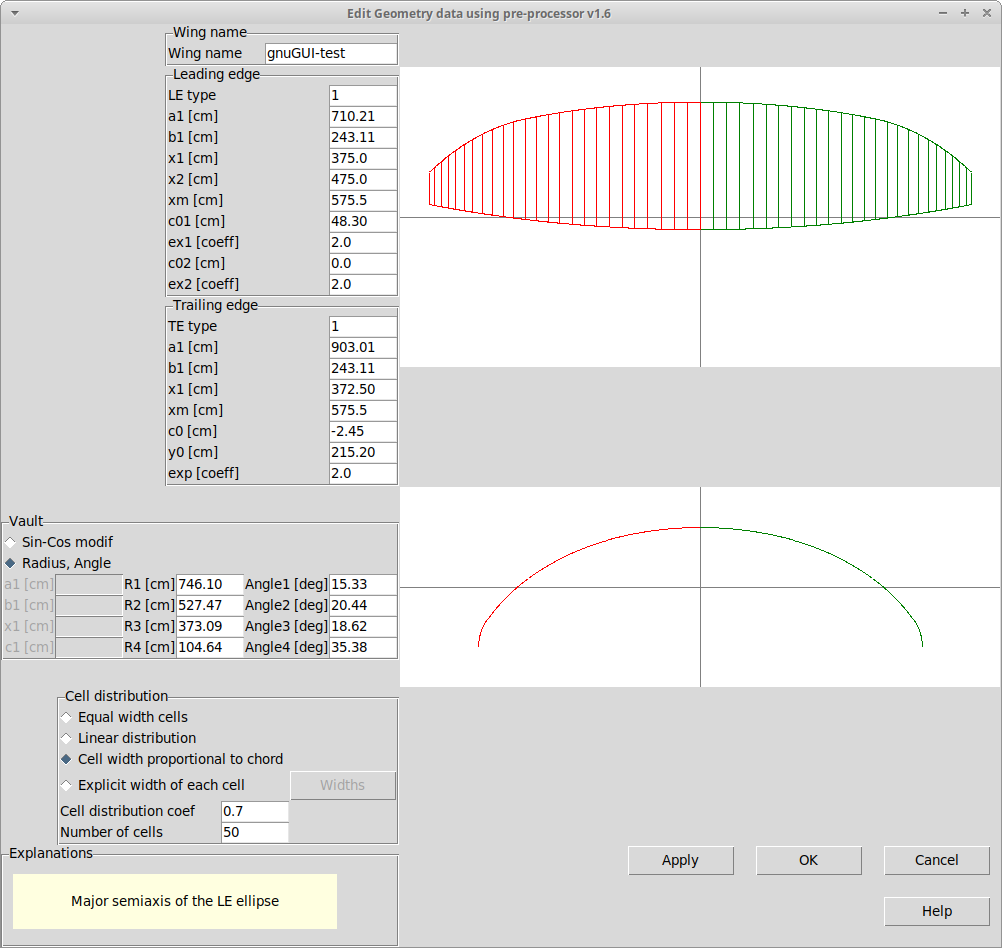
14) Experiment by changing some parameter and see what happens. Always do "Apply" after each change.
Go to pre-processor manual for more information.
15) Change cells number and do "Apply"
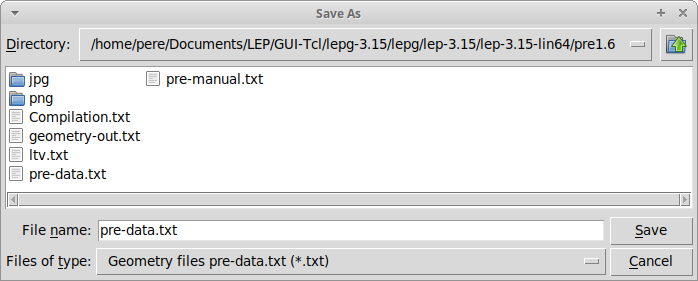
16) Once your geometry is correct, go to "Geometry" and "Save Geometry as..." pre-data.txt file.
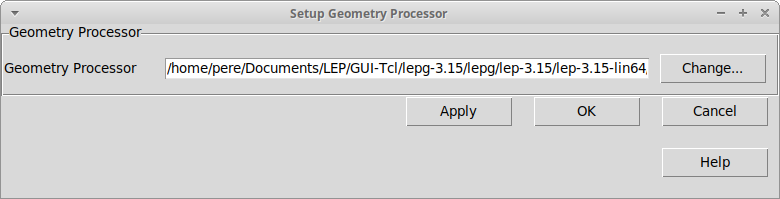
17) Menu "Settings", go to "Geometry-Processor" and select your executable file, pre-1.6-lin64.out or pre-1.6-win64.exe
18) Menu "Geometry", and do "Calc Geometry". A window with a yellow background will appear, with the reading confirmation.

19) Now
you can open the pre1.6 working directory, where the data file,
and result files in dxf and txt are located. The calculation is
finished and now you can analyze the dxf files with programs like
Autocad or equivalent:
geometry.dxf (2D planform and vault)
geometry-out.txt (txt report including geometry in numeric format "matrix of geometry")

20) Go to menu "Wing" and do "Import Matrix Geometry". The data of the
new geometry are loaded in the project. If the cells number has
increased compared to the initial version, some data sections (1 to 31)
will have autocompleted to try to give consistency to the whole data
set. This feature is not yet fully functional, so you will need to
manually review each of the sections 1 through 31 and check and adjust
the data consistency.
21) The conclusion is, that it is not easy to design a paraglider with
LEparagliding, neither with the graphic version nor with the
non-graphic version! :) But possibly the graphical version simplifies
things. And the plan is to continue adding improvements. At overall, design a paraglider is not easy work!
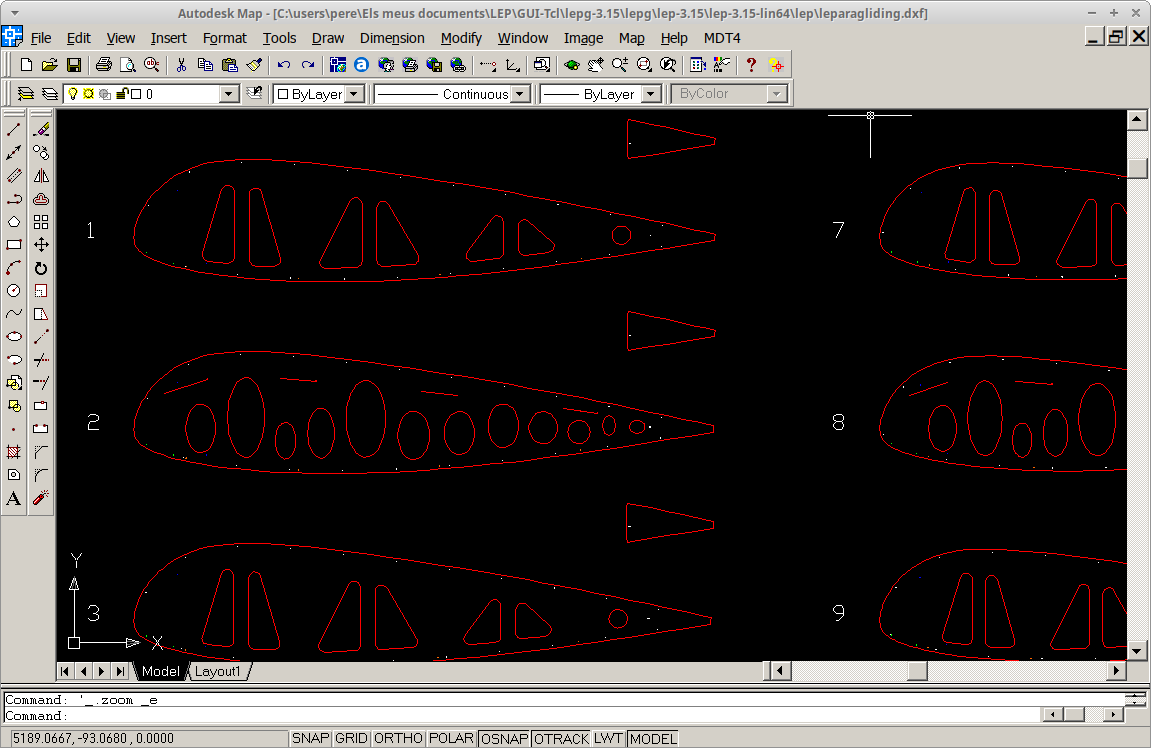
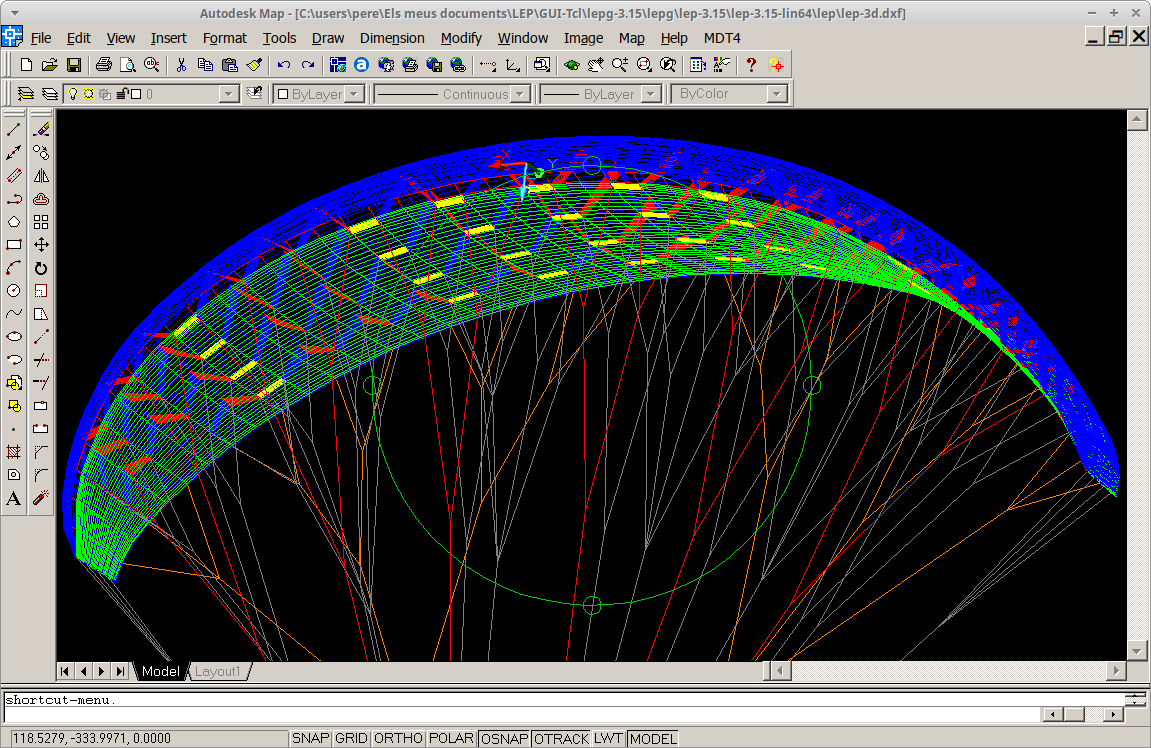
Inspect and edit 2D and 3D DXF files in a CAD programa
4. CONTRIBUTIONS
4.1 Language translations (to do)
The translations of lepg into your own language are very simple.
You only need to download the msg file and translate a catalogue of quotes in txt format, using
any text editor. If you want to contribute, you can translate (or make
corrections) to any of the files listed below (or others). But if you
want to make a language translation, tell us before by e-mail, since it
is possible that some colleague is working in the same language, and we
do not need to do the same work twice.
How
to improve or complete a translation file. Translations are saved in a
text file for each language in the form en.msg, de.msg, fr.msg etc. You
can open and edit this text file with any text editor such as wordpad,
gvim, or others. Each line, except the first and last, has two
sentences between "" and separated by one or more spaces. The first
sentence is the keyword or literal phrase to be translated. The second
sentence is the translation into the desired language. So you just have
to translate the second column of the file, and without modifying the
first. For a good translation, you should consider the following:
- If a "\ n" symbol appears, you must keep the same symbol in the translation, since it is a "newline" indication.
- You must follow the style of the reference file en.msg (or other .msg file completed)
- If a word is abbreviated, abbreviate the translation (otherwise the full word may not fit).
- If the explanation is long, you can do similar but add line break where necessary "\ n"
- In general, it seems that English is a bit more compact than other languages, try to compact the translation.
- Some keywords may be incomprehensible to translate (they are not sentences), then leave the same as the reference version.
- See the effect of your translation by replacing your .msg file with
the existing one in the lepg directory and restarting the program.
- Send the translation or correction by e-mail and will be added to the program.
4.2 Fixed graphic schemes
A simple way to add helps in the program is to add fixed
diagrams
(drawings in .jpg or .png) explaining the parameters of each section.
Currently only sections 1C and 27 have a graphical help button.
In the manual of the non-graphic version I have added some schemes but
most hand drawn. In the Russian version of the manual, there are many
better drawings, made with CAD. This work will need to be continued. So
help drawings can appear in a new window when you press a button.
4.3 Icons
Really, the icons of the GUI programs are useless, except for
shortcuts, and to give a more beautiful visual appearance. We have to
think about whether we need to add icons, and designing them.
4.4 Mac OSX integration
The Tcl/Tk interpreter is cross-platform and therefore the
program can run on different operating systems. Already successfully
verified on Windows and GNU / Linux. We need to add a few lines of code
to make it work on Mac OSX. And compile the fortran code correctly in
OSX... (not yet verified).
5. TO DO
- In general, fix some bugs that may occur when initializing some sections from initial 0 configuration.
- Verify the correct writing of the data file in all cases.
- And airfoil viewer, and optional edit.
- Work on the LEparagliding program to activate the .dat profiles as
option, and thus define the inlets dynamically through the GUI.
- Distribution of cells type-4 in the pre-processor not yet active
- Add more scroll regions since some data does not fit in the windows, especially when paragliding has many cells.
- Activate the help buttons.
- Create help drawings, fixed or interactive.
- Improve and clarify the connection between the pre-processor (Geometry) and the main processor (LEparagliding)
- Data consistency checker between the different sections.
- Add automation to help avoid inconsistencies.
- Do translations.
- Mac OSX integration
 Data entry for section 25, general 3D DXF options.
 Select your leparagliding.txt file to start or modify a design

Left: multilingual options (easy internationalization). Right: pre-procesor data edit for geometry


